Creating an aupreset

Using AU Lab to create an aupreset
Just fire up AU Lab. The UI is totally intuitive, amirite?
Fire up AU Lab
Add Instrument
Changing the Default Instrument
Key Range
Save Preset
File Paths
Summary
Resources
Introduction
Here are the steps to create an aupreset that consists of several audio files. We will set which MIDI key will trigger the individual files.
-
Fire up AU Lab
-
Create a new document
-
Add Instrument
-
Changing the Default Instrument
-
Key Range
-
Save Preset
-
File Paths
- If the audio file is found at the original path, it is loaded.
- If the audio file is NOT found, the AUSampler looks to see if a path includes a portion matching “/Sounds/”, “/Sampler Files/” or “/Apple Loops/” in that order.
- If the path DOES NOT include one of the listed sub-paths, an error is returned.
- If the path DOES include one of the listed sub-paths, the portion of the path preceding the sub-path is removed and the following directory location constants are substituted in the following order:
The download link is under Resources if you don’t have it.
Launch it.
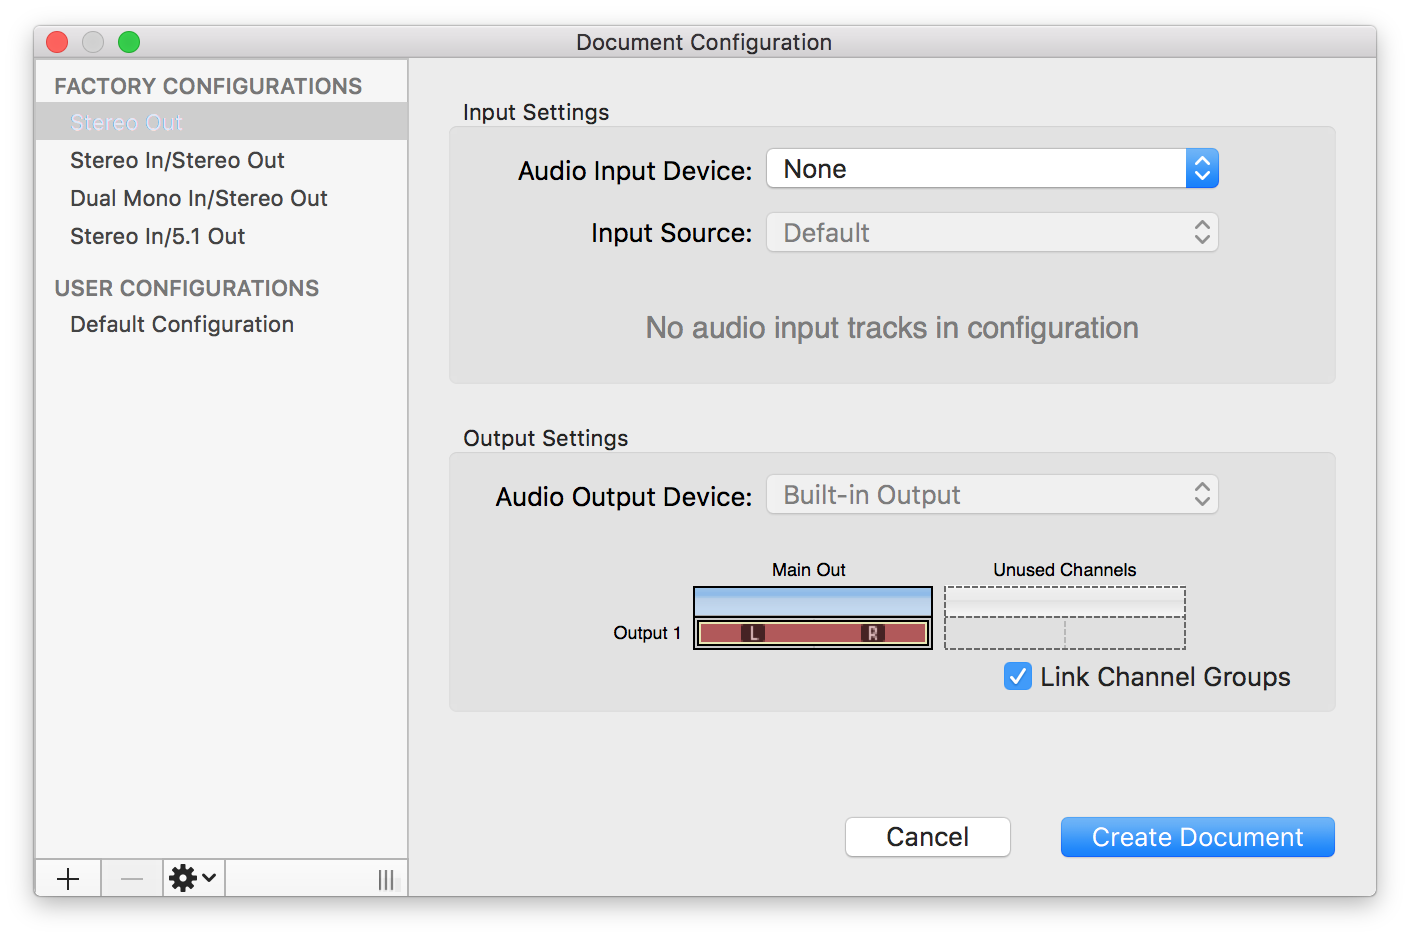
Choose factory configuration “Stereo Out”
Set audio input device to None
Choose “Add Audio Unit Instrument” from the “Edit” menu.
Set the instrument type to Apple->AUSampler.
Leave the MIDI Input Source to Any controller.

You should now see the keyboard. Press some keys and you’ll hear the default sine wav.
Now you need to replace the sine wave with your sound file(s).
There are 3 icons under the keyboard on the right. Press the rightmost icon that looks like a keyboard to bring up the Zone and Layers editor.
Under Layer 1 you should see “Sine 440 Built-In” for the samples.
On the bottom left, under the Zone and Layers tree control, you should see a + and – button.
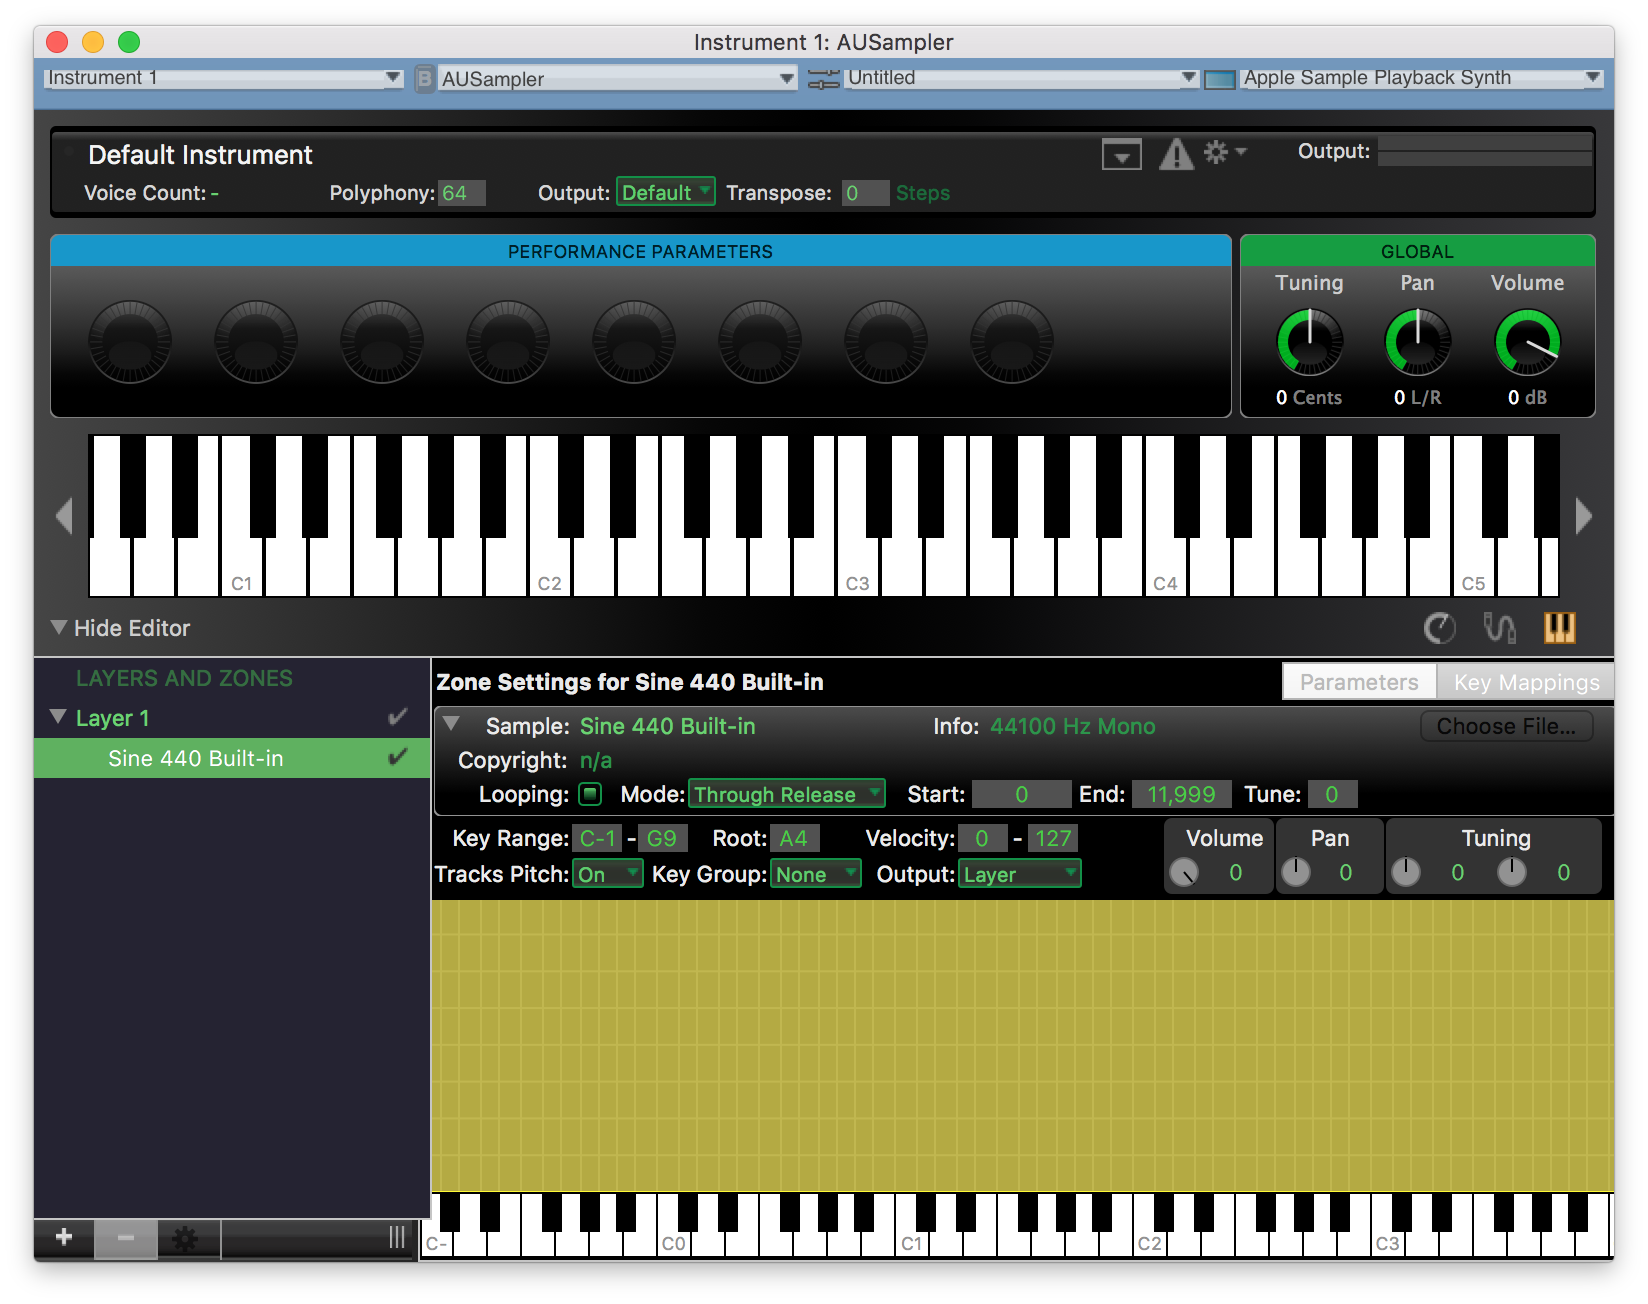
With the Sine wave selected, press the + button to add your sound file.
When you press the keys on the keyboard now, you will hear the sine wave and your sound file.
Select the Sine wave and press the – button to delete it.
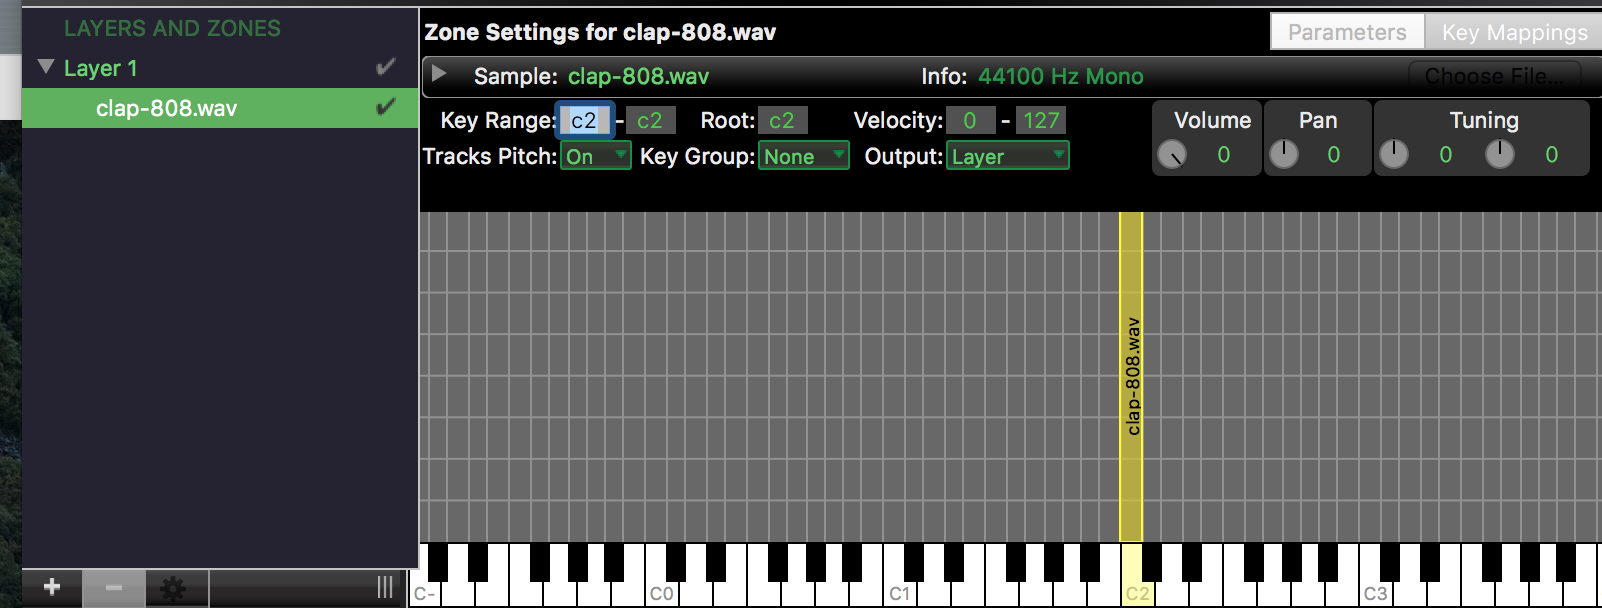
You set the key that will trigger your sound file as-is by setting the Root. Set it to C4, and when you press C4 on your keyboard, your sound will play. Play C5 and it will be resampled an octave higher. Maybe you want this, maybe not. That’s why you set the range and root to something that is acceptable to you.
If you want to create a “drum machine”, where each key is a different drum patch, then you set the root to the key you’d like, but also the range to be that key too. So, for C4, the range is C4-C4 and the root is C4. You will hear your patch only when C4 is pressed.
There are 4 combo boxes at the top of the window. The third one labled Untitled by default is how you save your preset. Press it and choose Save Preset As… from the popup. Type a name, and choose User among the radio boxes.
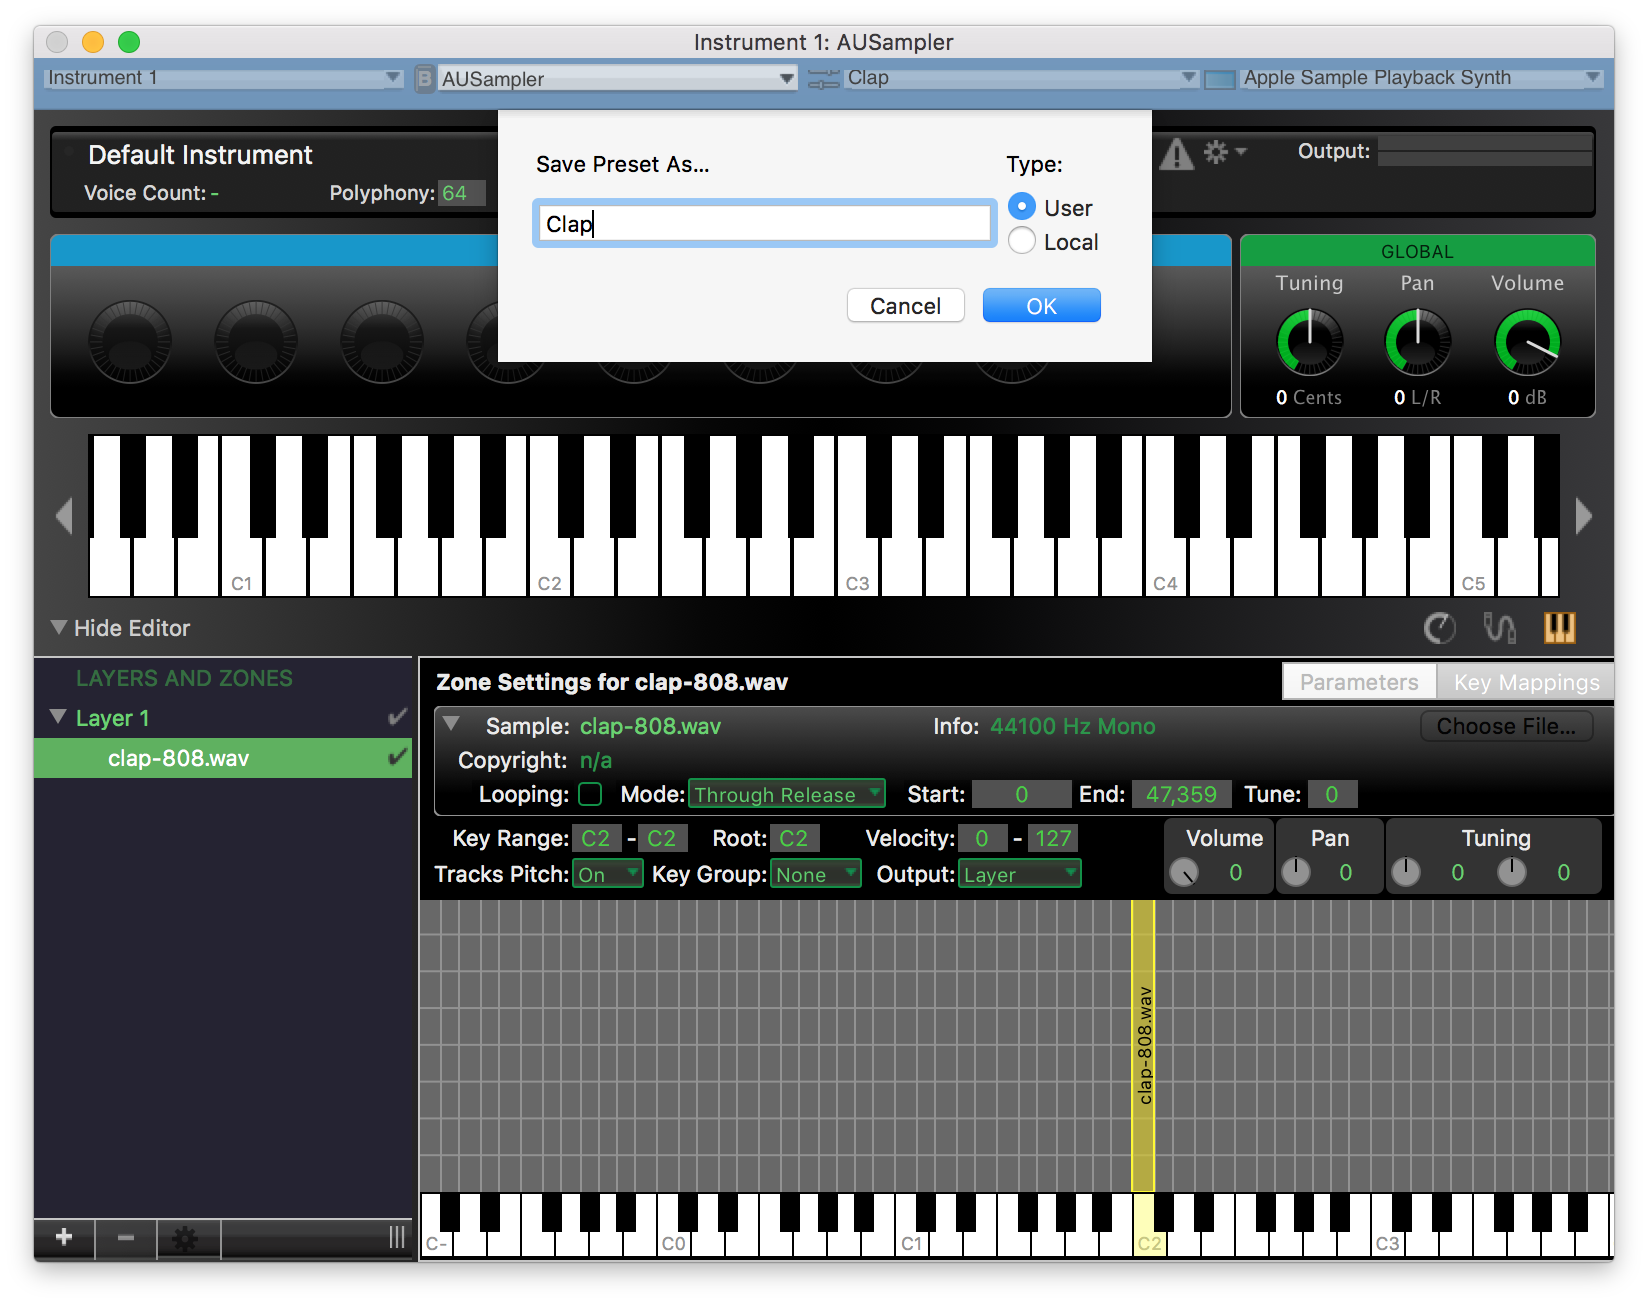
By choosing User, your preset file will be saved to ~/Library/Audio/Presets/Apple/AUSampler/
The aupreset file is just a plist. Go ahead an look at it. Check out the file paths for your samples.
So, how does this work on iOS when those paths don’t exist?
According to Tech Note TN2283, the AUSampler will use these rules to resolve each path:
Bundle Directory
NSLibraryDirectory (NOTE: Only on OS X)
NSDocumentDirectory
NSDownloadsDirectory
In an iOS application let’s say the original path in the aupreset is ~/Library/Audio/Sounds/bang.caf.
The AUSampler would then search for the audio file in the following places:
<Bundle_Directory>/Sounds/bang.caf
<NSDocumentDirectory>/Sounds/bang.caf
<NSDownloadsDirectory>/Sounds/bang.caf
tl;dr Create a Sounds directory and place your samples there.
Summary
Add sample files to an instrument in AU Lab. One of the things you can do is set the range
and root pitch.
Resources
AU Lab download
currently version 2.3 from 2012
WWDC 2011 video viewable in Safari only.
“The download link is under resources”. Can you provide this link? I don’t know what “resources” you are referring to here. Thank you.
Further down on this page there is a div with a yellow background and a header entitled “Resources”. It’s also in the table of contents. The link is in that section.
Got it. Thanks.
I followed your instructions to create an AUPreset file, but when I try to “Save Preset”, AULab crashes. Any suggestions?
OK, looks like it created the .aupreset file before it crashed so I’ll go with that. Thanks again.